| |
This page descripbes how you can set up a phosphorescent sky above your
bed, complete with all constellations.
Note that to print the high-resolution images, you save the image to
your computer and then use some other program, like the Windows Picture
and Fax Viewer. This enables you to resize it to the size of the paper.
| 1. |
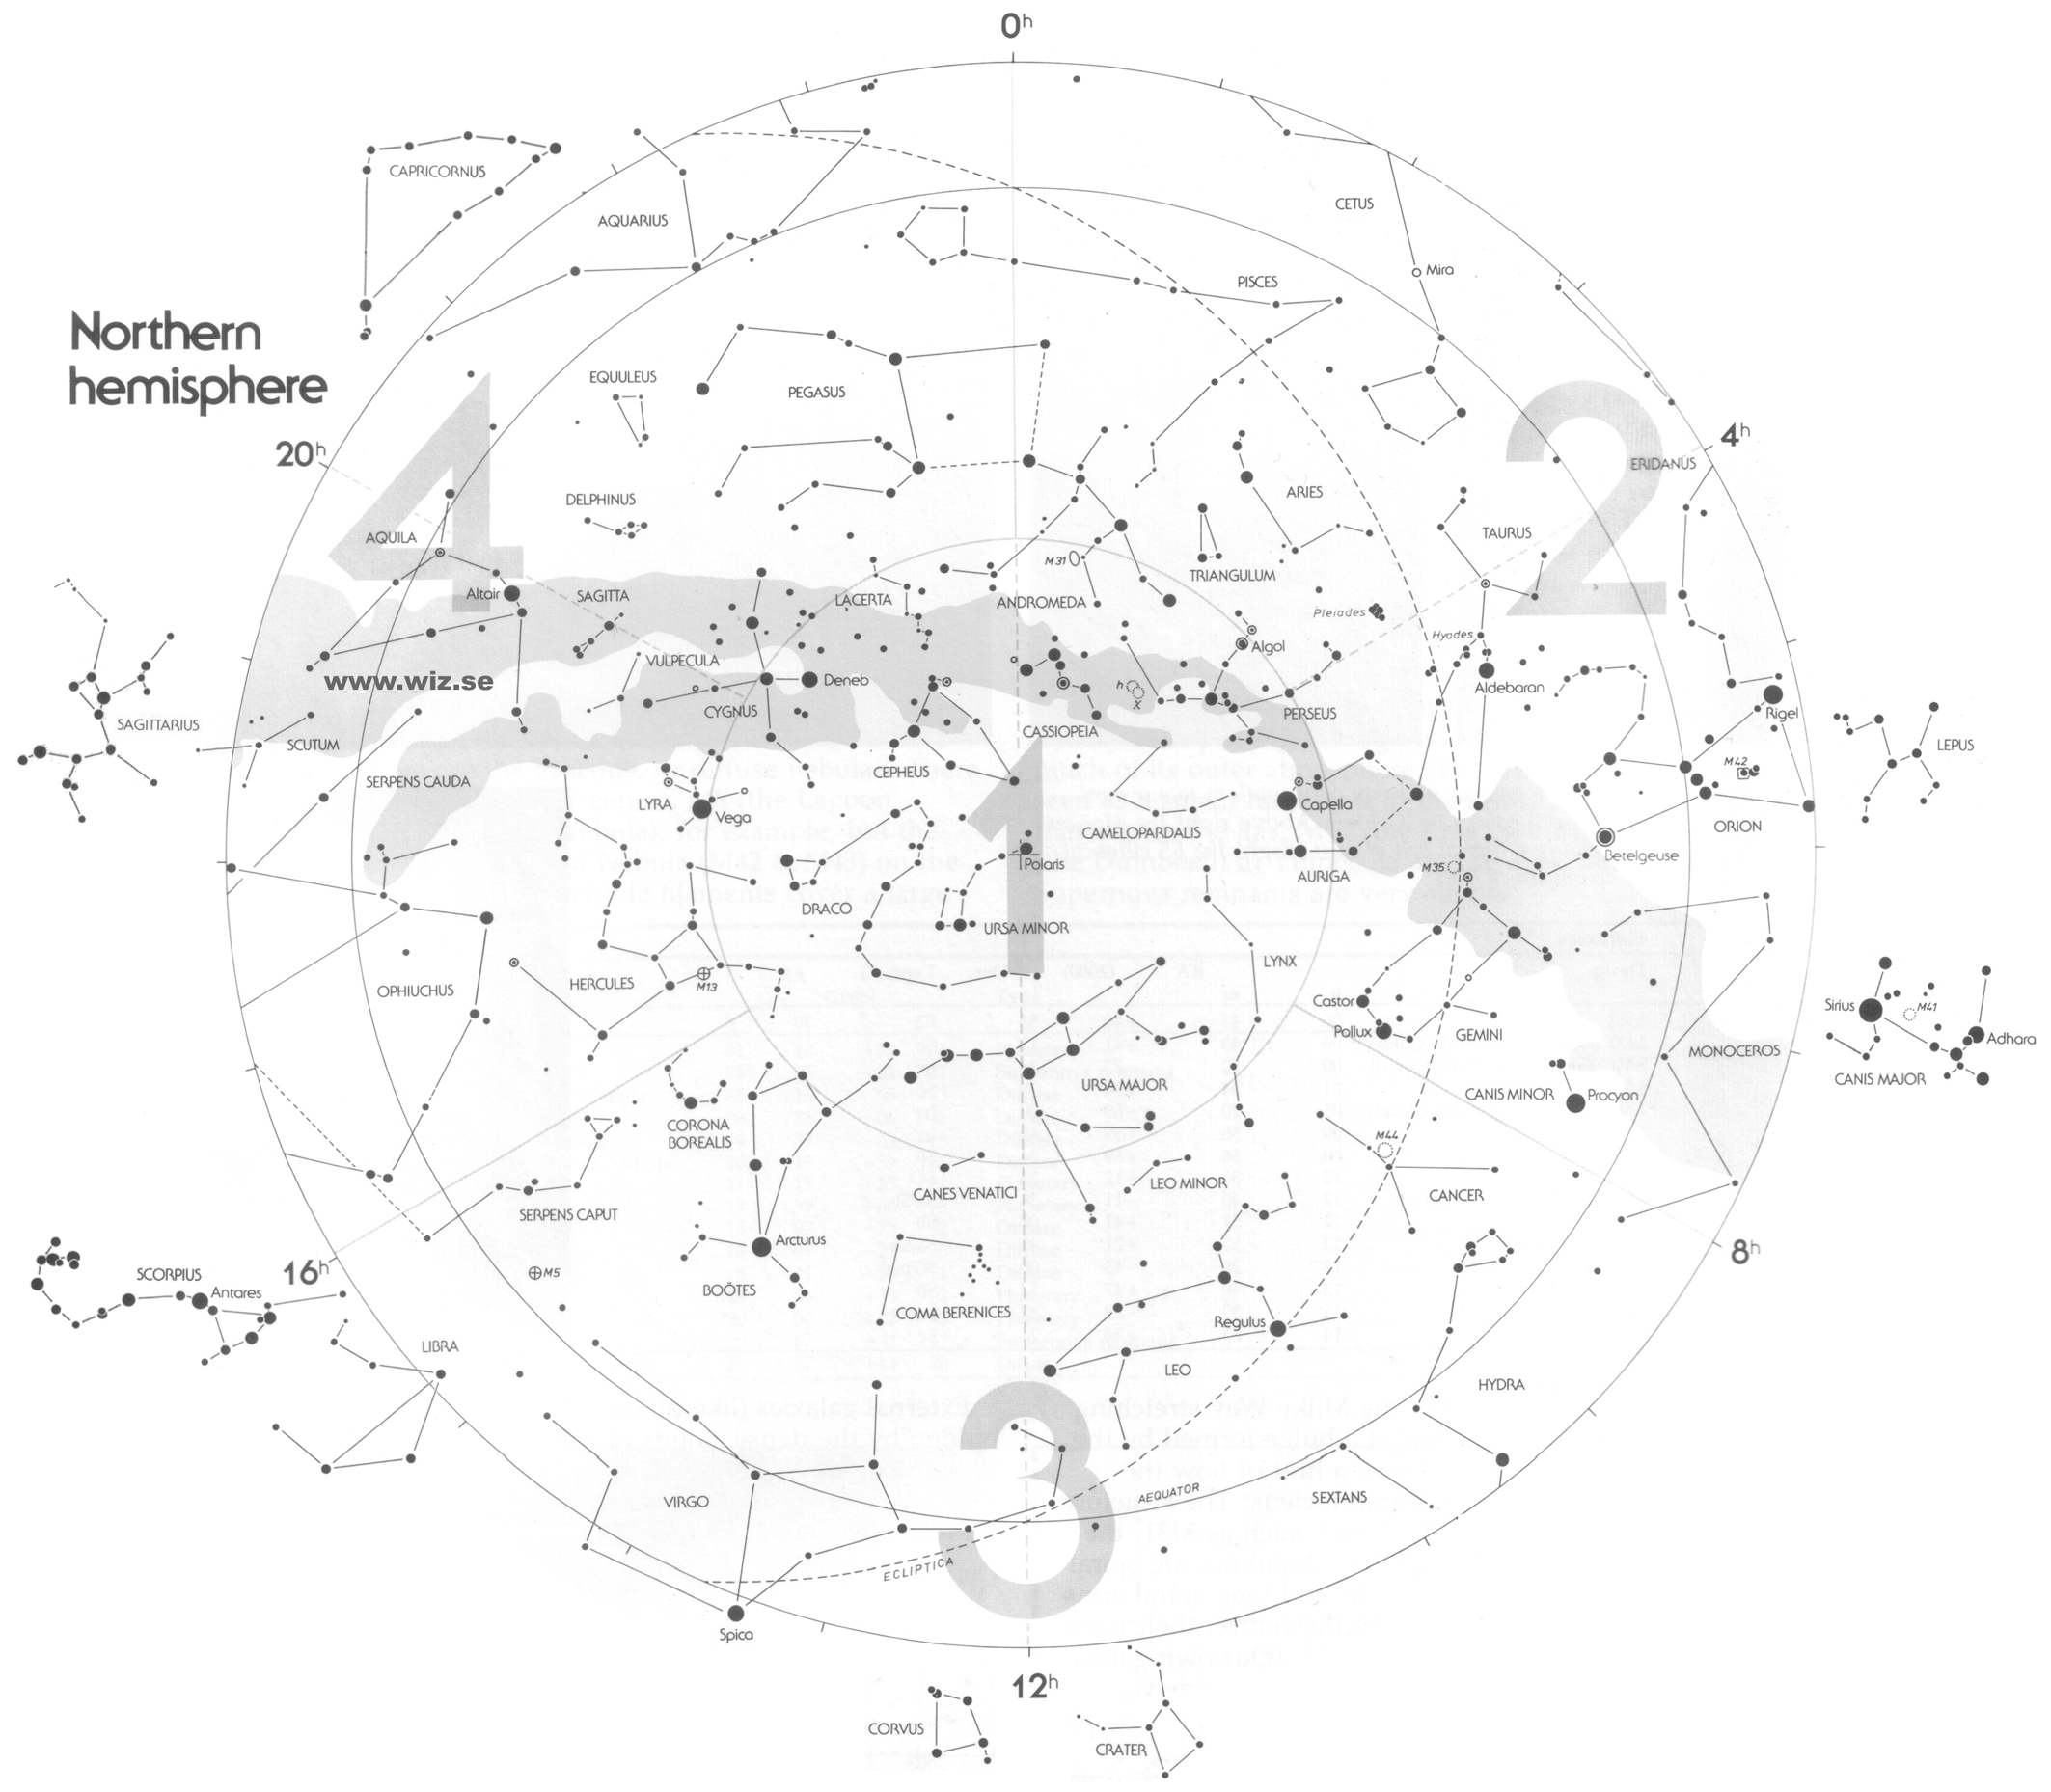
If you want to set up the northern sky, print the northern
map and the northern
grid files.
If you want to set up the southern sky, print the southern
map and the southern
grid files.
The grid file is used when you create the sky, the map is used
later for identifying constellations.
|
| 2. |
Get the following equipment:
- Phosphorescent adhesive tape. I have bought a brand called GlowLite
Nova from Systemtext
in Stockholm, width 25 mm. You need about 50 cm.
- Masking tape, about 15 mm wide. Use the lightly adhesive type
used for making sharp lines when painting.
- Pen for making marks on the masking tape and crossing completed
stars on the grid printout.
- Sissors
- Paperknife (very sharp)
- A ceiling, preferably white and above a bed
- Ladder to reach the ceiling
- About 6 hours of time
|
| 3. |
 Cut
the main stars from 16 squares of the phosphorescent tape, each
25 times 25 mm. Cut
the main stars from 16 squares of the phosphorescent tape, each
25 times 25 mm.
Use four of the squares for the largest stars, each created by dividing
the square into 2 by 2 smaller squares and cutting off the corners
to create octagonals. This creates a total of 4 * 2 * 2 = 16 stars
of largest size. Not all are necessarily used.
Use five of the squares for the midsized stars, each created by
dividing the square into 3 by 3 smaller squares and cutting off
the corners to create octagonals. This creates a total of 5 * 3
* 3 = 45 stars of middle size.
Use seven of the squares for the midsized stars, each created by
dividing the square into 4 by 4 smaller squares and cutting off
the corners to create octagonals. This creates a total of 7 * 4
* 4 = 112 stars of small size.
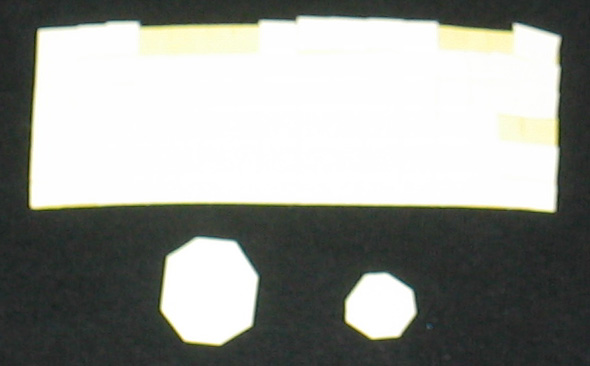
The image shows a strip of the tape with the a large and a midsized
star. Click on the image for enlargement.
 The
smallest stars are created by cutting a 15 centimeter long bit of
the tape. Then use the paperknife to cut the strip in half, lengthwise,
but cut only through the actual phosphorescent tape, not the back.
Then use the knife to cut each of the two stripes in three stripes
in the same way, resulting in a total 6 stripes of tape still attached
to the back of the tape. Then use the knife to cut out the smallest,
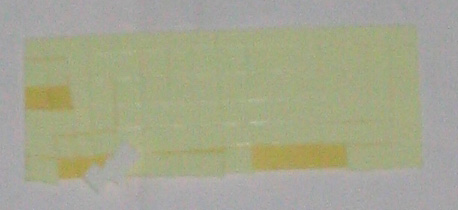
square stars, six at a time. The image shows a finished strip. Click
on the image for enlargement. The
smallest stars are created by cutting a 15 centimeter long bit of
the tape. Then use the paperknife to cut the strip in half, lengthwise,
but cut only through the actual phosphorescent tape, not the back.
Then use the knife to cut each of the two stripes in three stripes
in the same way, resulting in a total 6 stripes of tape still attached
to the back of the tape. Then use the knife to cut out the smallest,
square stars, six at a time. The image shows a finished strip. Click
on the image for enlargement.
|
| 4. |
Tear off 81 pieces of the masking tape, attaching the pieces individually
on your lower arm for easy access. Then use the pen to put a small
x or a circle on each one. These are used for marking the grid. |
| 5. |
Measure a square area of the ceiling above your bed you can use
for the sky. Divide the side length by 8 to get the distance between
each grid intersection. For instance, if you have a 2 by 2 meter
square, the grid intersection distance will be 25 cm.
|
| 6. |
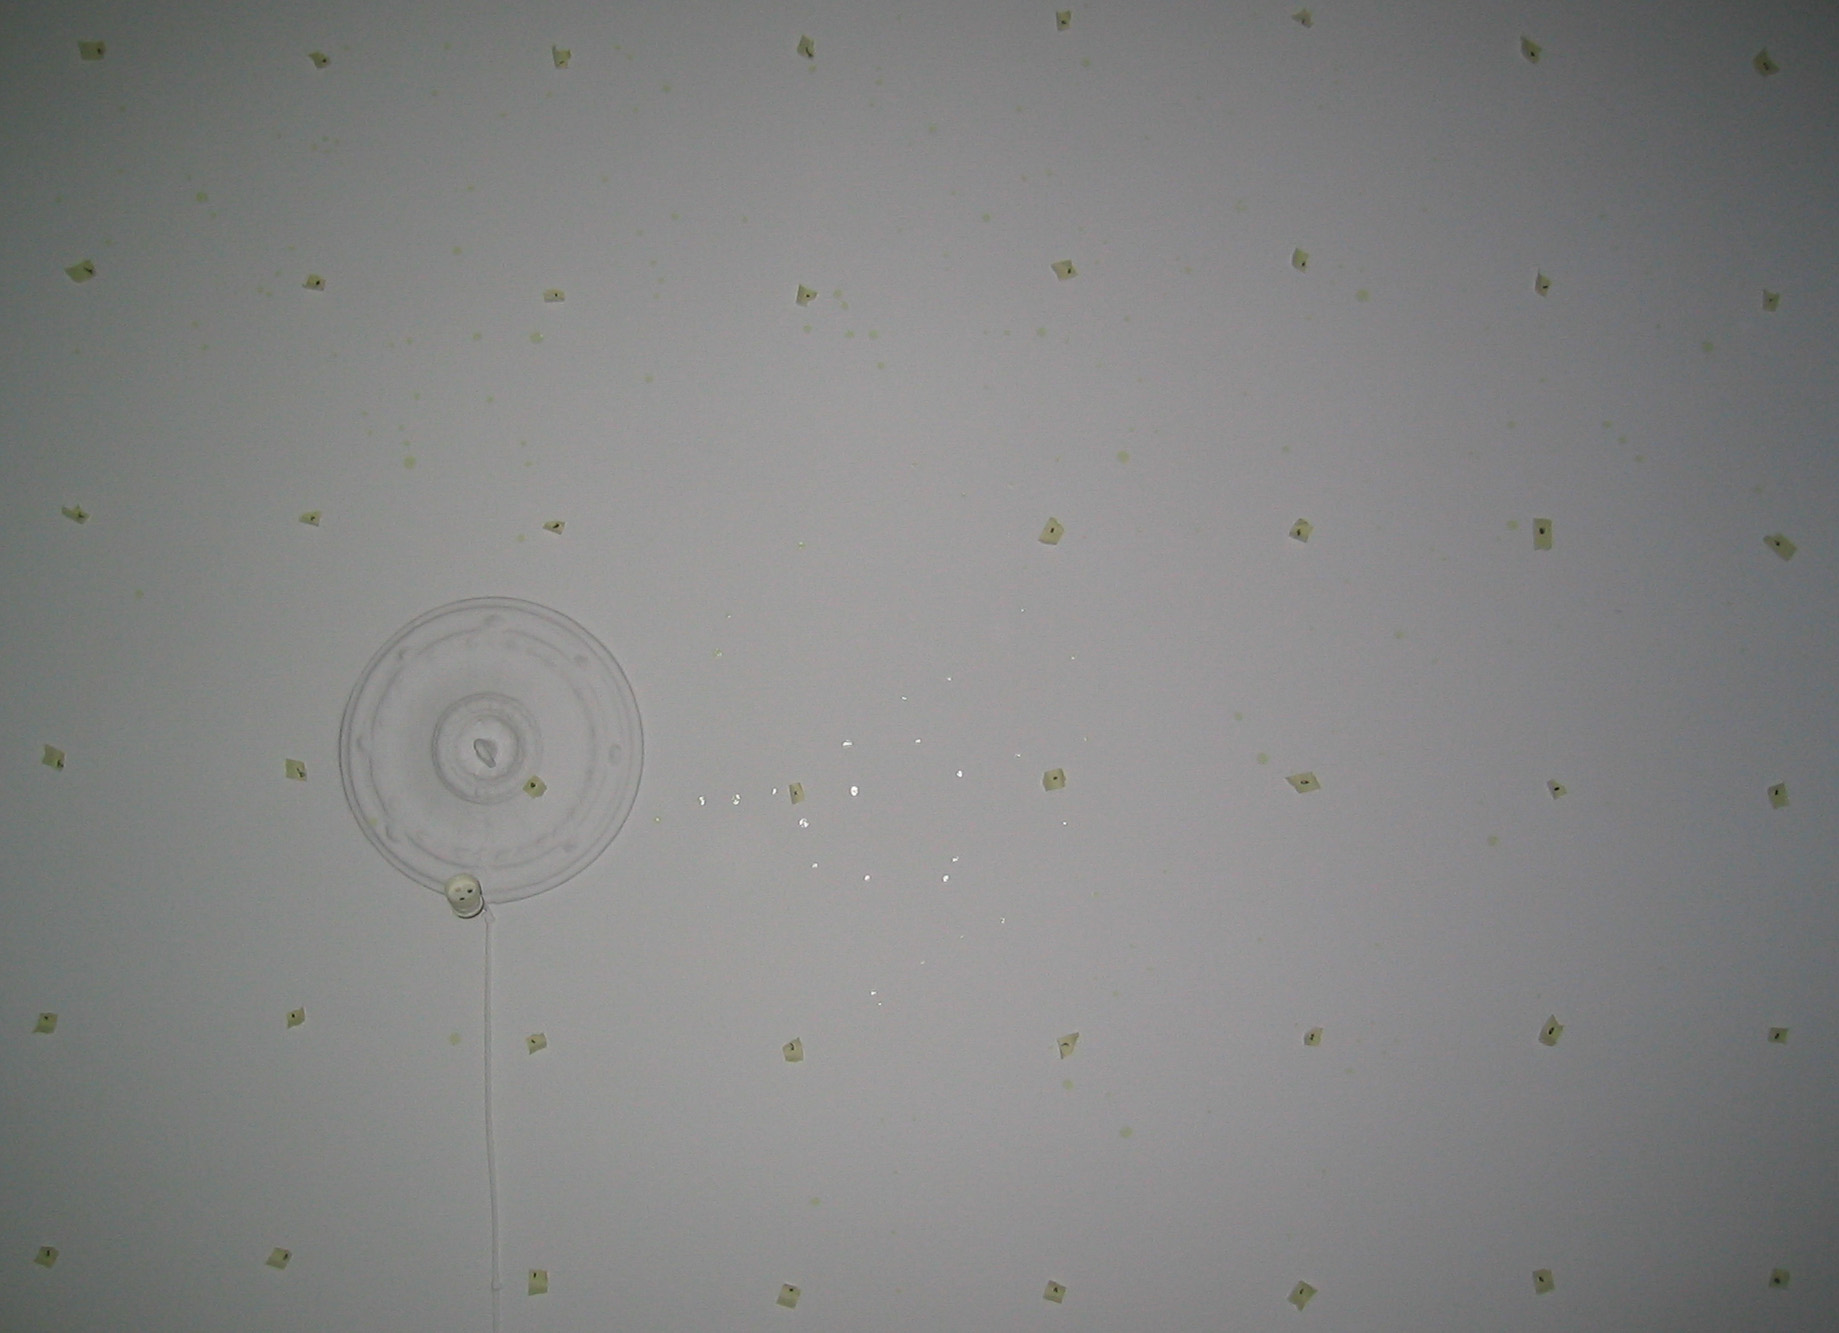  Climb
the ladder. Use one masking tape piece to mark the center. Next,
use the other 80 pieces to mark the grid intersections. Get down
from the ladder to examine the grid, checking each row and column.
Make adjustments until you are satisfied that the grid is evenly
distributed. Click on the images for enlargement. Climb
the ladder. Use one masking tape piece to mark the center. Next,
use the other 80 pieces to mark the grid intersections. Get down
from the ladder to examine the grid, checking each row and column.
Make adjustments until you are satisfied that the grid is evenly
distributed. Click on the images for enlargement.
|
| 7. |
Looking at the ceiling from the bed, the orientation of the stars
could match the map printout. However, since the sky is revolving,
the orientation is not crucial.
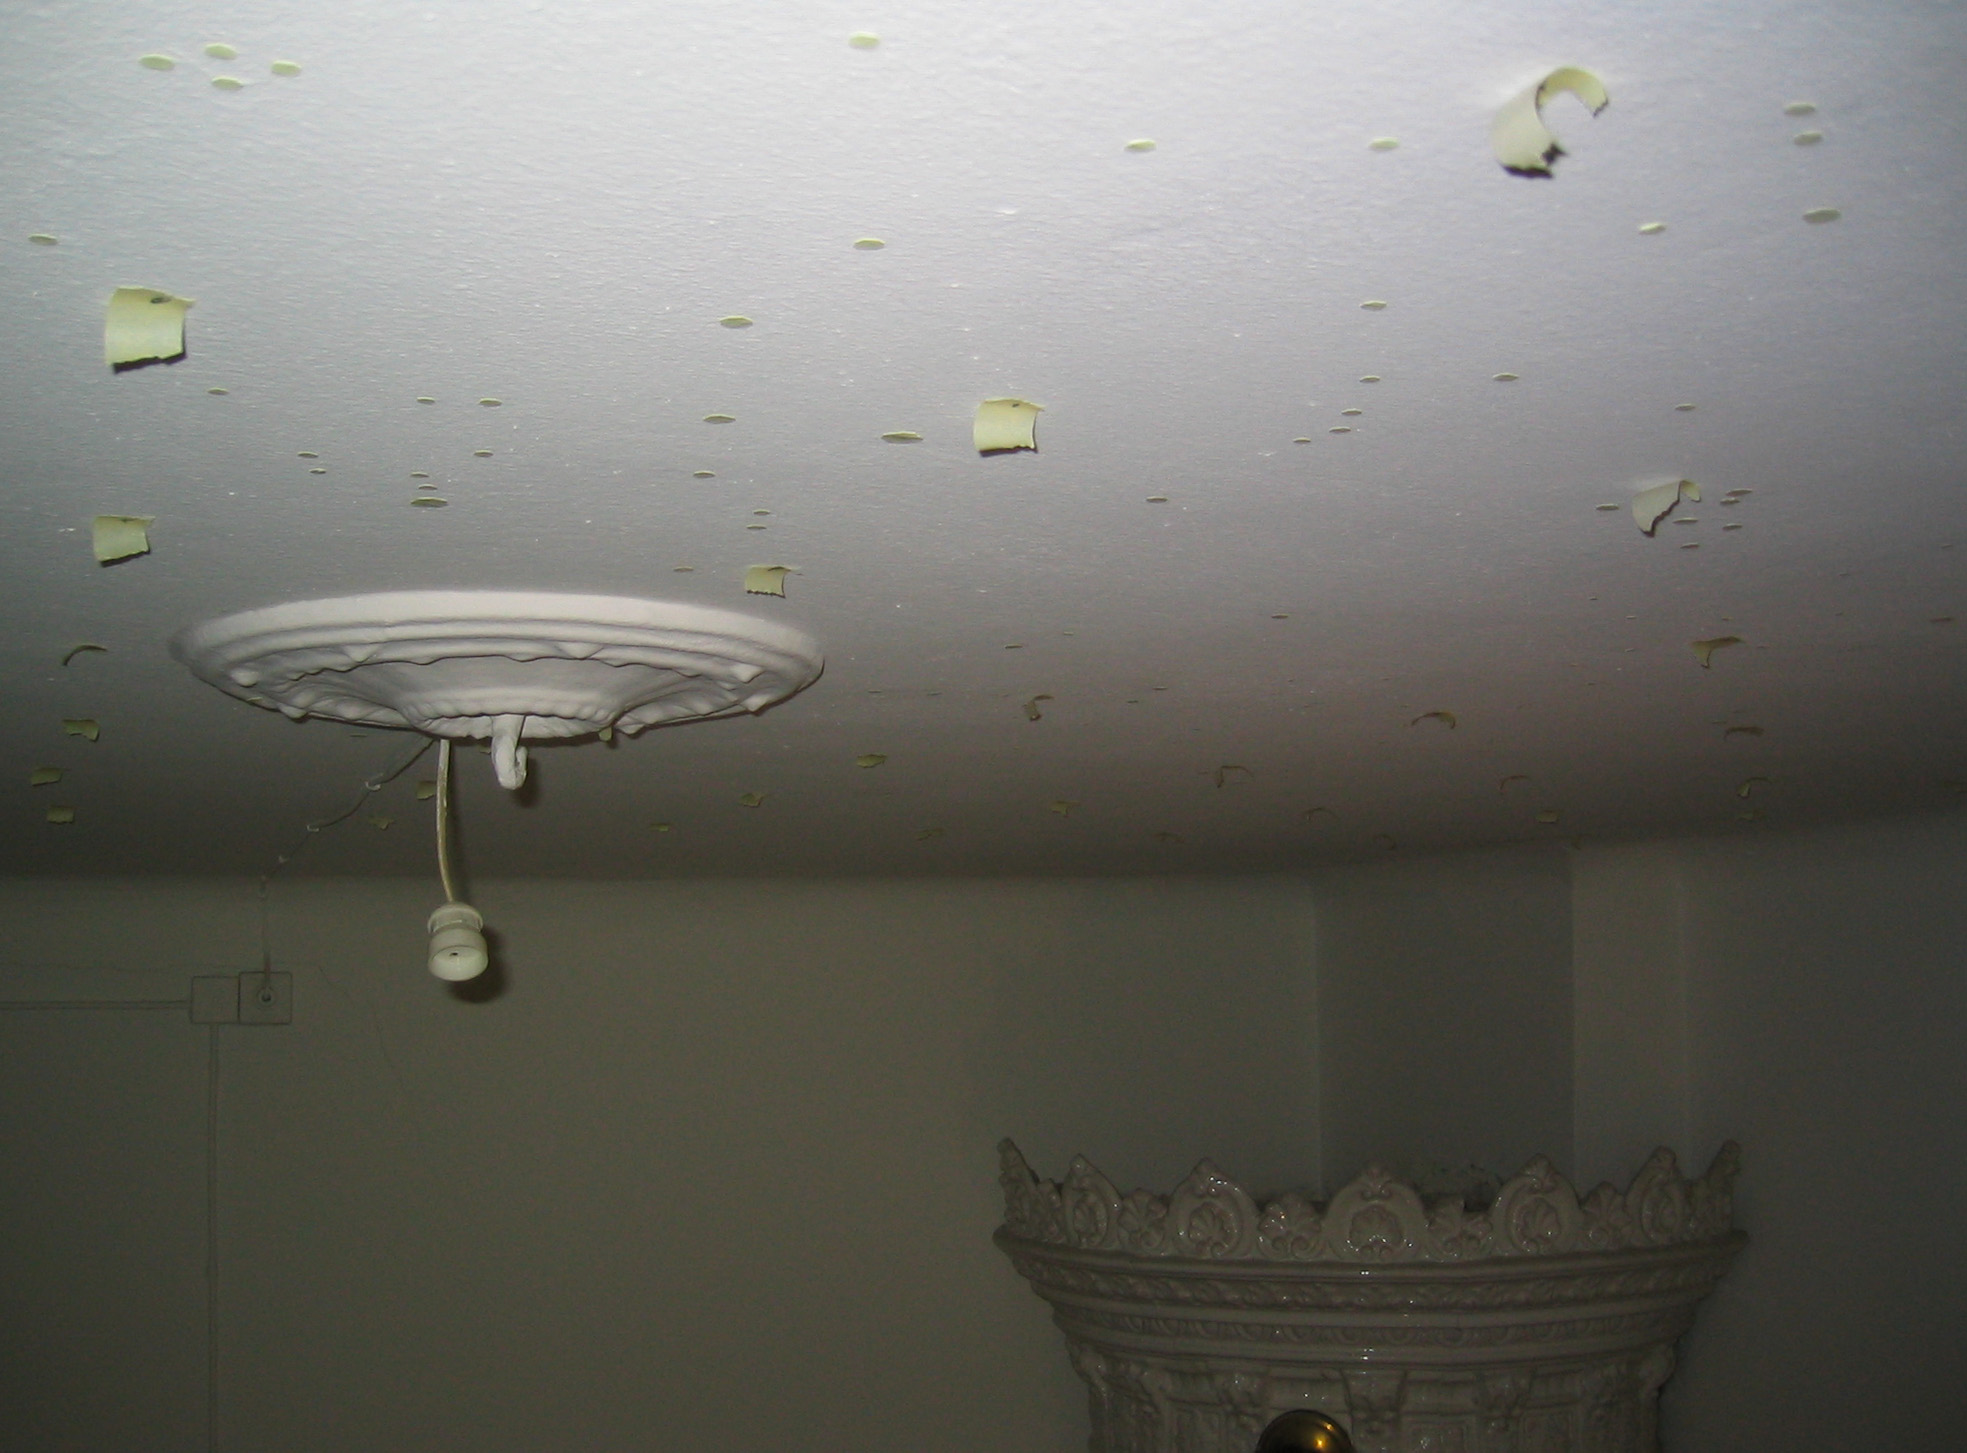
Use the grid printout to place the stars of the largest size, like
Vega and Altair, using the largest stars of the phosphorescent tape.
When you add a star, cross it off on the grid printout.
Do the same with the middle size, like Polaris and some stars of
Ursa Major, crossing them as you add them to the ceiling.
Do the same with the small size. Remember to cross out the stars
that are done.
Then use the smallest, square stars of the long strip to add all
the remaining stars of the constellations. You can add stars outside
the canstellations of you want to. Remember to cross out the stars
you have already added.
If you need more stars, you can obviously cut some more.
|
| 8. |
Remove the masking tape. |
| 9. |
Now you are done. Wait until it is dark and enjoy. You can make
adjustments at any time using the ladder and the knife (for removing
phosphorescent tape off the ceiling).
Note that the tape is charged by light, slowly giving off light
when dark. The sky will glow for about half an hour after turning
off the light in the room.
I have compiled a simplified
version with the swedish names.
It was originally found on the Onsala
rymdobservatorium (Chalmers) site.
Idea by Sven Trebard
Gothefors
|
|
|